

SOURCE: http://www.domestifluff.com/2009/11/how-to-make-a-ruffly-felt-rosette-wreath/
What you’ll need for the wreath:
- a 12 inch styrofoam wreath form
- approximately 2 1/2 yards of felt
- straight pins (enough to match the number of felt circles needed, plus two for attaching the hanger)
- scissors
- a 3 inch circle template
- a pencil
- ribbon for hanging
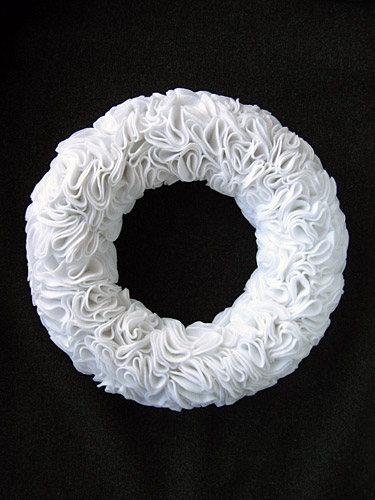
Using a pencil and your circle template (or that great tutorial from maya*made), trace circles onto the felt. Cut the felt circles, and fold them in half twice to form rosettes. Insert a pin near the bottom corner of the rosette, about 1/8 inch from the corner.
Attach the felt rosettes to the wreath form, making sure to group the rosettes tightly enough that no styrofoam is showing through the rosettes. After you’ve added a few, fluff and adjust the rosettes to your liking. Continue making, pinning, and attaching the rosettes until you’ve worked your way around the wreath form. If you have circles that are slightly misshapen or that have a little pencil or ink on them, place them toward the outside or inside edges, where they can’t be seen when the wreath is hanging.
This is what my wreath looked like on the back when I was finished. As you can see, I started off with ball point straight pins, but I switched to flat head pins when the rosette count started to get up there and I had to run out and buy more pins. If you use flat head pins, then I suggest using a thimble to push them into the wreath form, or your thumb will take a beating. Ask me how I know.
After you’ve finished adding the felt rosettes, cut a 5 inch length of ribbon, fold it in half, and attach it to the wreath form with two pins to form a hanger.
No comments:
Post a Comment